In Which a Project was Undertaken, Part 2
Before I get into the nitty-gritty of how I trained the neural network, I want to go over how I set up the environment for the training. There is quite a bit of detail involved, which I want to note down both as a reminder to myself, in case I ever need to repeat the process, and to show everyone what steps were necessary. See the last blog if you want to know which projects I considered (In Which a Project was Undertaken, Part 1: link).
At first I tried running the training on Google Colab, since I was used to doing so from the class assignments in the Coursera specializations (see In Which Instructions were Sought, Part 1: link, Part 2: link, Part 3: link for more details). It was fine to run it in Colab back then, the models were small and most finished training very quickly, usually taking no more than 15~20 minutes to train a few hundred epochs, so there was no pressing need for me to move the computation onto my own machine.
However, Colab was getting slower and slower for some reason, and even the simple neural network I had started with was taking about 370 seconds per epoch, adding up to over 20 hours for 200 epochs. Sure it's not very long when compared with large neural networks trained for serious applications, but for this toy project I wanted to iterate quickly and try out many different scenarios so I can learn what works and what doesn't.
On top of the slowdown, at this length of time I started running into other major problems of Google Colab:
I followed the instructions on this site (link) to connect the Colab notebook to Google Drive. Using the code from that site, I was able to save and load the parameters. However, for some reason, neural networks with loaded parameters ran incredibly slowly, which made this method of training a no-go.
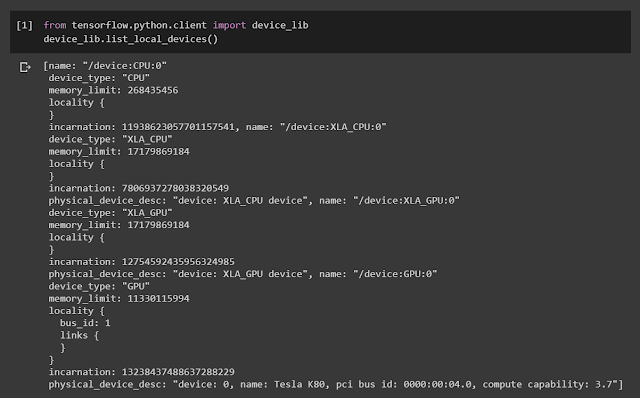
In case you are curious whether the specs of the Colab machines have been upgraded, you can use the code on this site (Medium link) to check CPU/GPU/RAM specs. Here are the specs when I checked.


To enable GPU accelerationon your machine, you needed to install Nvidia CUDA (Nvidia link) and the CUDA Deep Neural Network library (cuDNN: Nvidia link). Then, the path to the CUDA folder needs to be added to the system variables. See here for how to do it on Windows 10 (Superuser link). You also need to upgrade from TensorFlow 1.4 to the GPU-enabled version of 2.0. This blog describes the process: Medium link.
As new versions of these tools are released, the process will differ slightly. In fact, the instructions above are already different from the steps I took.
I wanted to compare the performance between running on Google Colab and running locally by switching between the "Connect to hosted runtime" and "Connect to local runtime" options so that it is easy to use the same notebook to do the comparison, therefore I looked for a way to enable running Colab notebooks on my machine.
To run Google Colab notebooks locally, I followed the instructions on this Google page: Google link. First I installed Python 3 and Jupyter by installing Anaconda, then I installed and enabled the jupyter_http_over_ws extension, and finally I launched the Anaconda Powershell prompt and started the server. After this, Colab notebooks can be connected to the local runtime.
Now with the training running reasonably fast, I can begin to explore how best to train the neural network in earnest. Please follow along in my next blog (link) as I run into obstacle after obstacle, trying to get the network to train!
Maximum Power!
 |
| I turn all my processing power up to 11 (Wikipedia link, IMDB link) |
At first I tried running the training on Google Colab, since I was used to doing so from the class assignments in the Coursera specializations (see In Which Instructions were Sought, Part 1: link, Part 2: link, Part 3: link for more details). It was fine to run it in Colab back then, the models were small and most finished training very quickly, usually taking no more than 15~20 minutes to train a few hundred epochs, so there was no pressing need for me to move the computation onto my own machine.
However, Colab was getting slower and slower for some reason, and even the simple neural network I had started with was taking about 370 seconds per epoch, adding up to over 20 hours for 200 epochs. Sure it's not very long when compared with large neural networks trained for serious applications, but for this toy project I wanted to iterate quickly and try out many different scenarios so I can learn what works and what doesn't.
On top of the slowdown, at this length of time I started running into other major problems of Google Colab:
Jobs can only run for up to 12 hours
Google Colab notebook will disconnect after 12 hours, and all state will be lost. For longer runs, code needs to be added to connect to Google Drive storage, and trained parameters stored on there before the timeout occurs. Then the job needs to be restarted by loading the stored parameters and continuing the training.I followed the instructions on this site (link) to connect the Colab notebook to Google Drive. Using the code from that site, I was able to save and load the parameters. However, for some reason, neural networks with loaded parameters ran incredibly slowly, which made this method of training a no-go.
Sometime jobs just stop or crash for no apparent reason
Having to save and restore state is already a hurdle, but even worse is that sometimes the training crashes, or the notebook would lose connection to the server for no reason. This makes every run a crap shoot, and setting up runs overnight have led to disappointing mornings.Only a Nvidia K80 is available for training
When I compared the performance of Nvidia K80 offered by Google Colab versus the Nvidia GTX 1070 in my laptop, I was surprised to find that the GTX 1070 is significantly better. So I decided to run the training locally on my laptop (I know, I know, why did I go through the whole rigmarole of figuring out what kind of computer to get if I wasn't going to use it? Well, I had assumed incorrectly that Google would be able to offer better resources than what I have available in my laptop. Lesson learned: Don't expect too much from "free", even if it is Google.) |
| Compute capability data from Nvidia (link) |
In case you are curious whether the specs of the Colab machines have been upgraded, you can use the code on this site (Medium link) to check CPU/GPU/RAM specs. Here are the specs when I checked.


Buy Local
 |
| I heard it's true in real estate as well (Mutts link) |
To enable GPU accelerationon your machine, you needed to install Nvidia CUDA (Nvidia link) and the CUDA Deep Neural Network library (cuDNN: Nvidia link). Then, the path to the CUDA folder needs to be added to the system variables. See here for how to do it on Windows 10 (Superuser link). You also need to upgrade from TensorFlow 1.4 to the GPU-enabled version of 2.0. This blog describes the process: Medium link.
As new versions of these tools are released, the process will differ slightly. In fact, the instructions above are already different from the steps I took.
I wanted to compare the performance between running on Google Colab and running locally by switching between the "Connect to hosted runtime" and "Connect to local runtime" options so that it is easy to use the same notebook to do the comparison, therefore I looked for a way to enable running Colab notebooks on my machine.
To run Google Colab notebooks locally, I followed the instructions on this Google page: Google link. First I installed Python 3 and Jupyter by installing Anaconda, then I installed and enabled the jupyter_http_over_ws extension, and finally I launched the Anaconda Powershell prompt and started the server. After this, Colab notebooks can be connected to the local runtime.
Final Destination
 |
| The Master Control Program has dismissed you (Wikipedia link, IMDB link) |
Now with the training running reasonably fast, I can begin to explore how best to train the neural network in earnest. Please follow along in my next blog (link) as I run into obstacle after obstacle, trying to get the network to train!
Comments
Post a Comment